
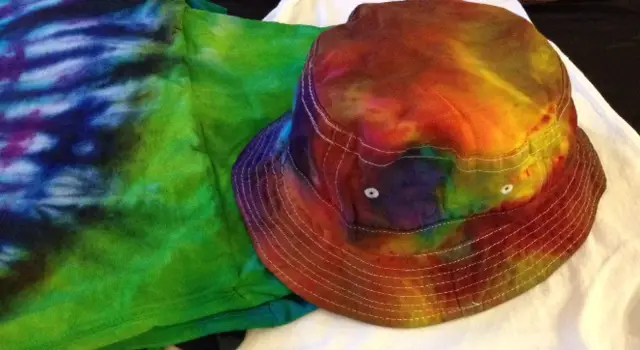
Tie-dying is a fun and easy way to add some color and personality to your wardrobe. One of the most popular items to tie-dye is a bucket hat. Not only is it a functional accessory for keeping the sun off your face, but it’s also a great canvas for creating unique designs. Explore the steps of tie-dying a bucket hat, from preparing the materials to finishing the project.
Step 1: Gather Materials
The first step in tie-dying a bucket hat is to gather all of the materials you’ll need. You’ll need a white or light-colored bucket hat, fabric dye (powder or liquid), rubber bands, plastic gloves, a plastic container or bucket, and a plastic tablecloth or trash bag to cover your work surface.
Step 2: Prepare the Hat
Before you start dyeing, you’ll need to prepare the hat. Make sure the hat is clean and dry. You can do this by washing it in warm water and letting it air dry. Once it is dry, you can start to apply the rubber bands to create the design you want.
The rubber bands will act as resist, preventing the dye from penetrating the areas of the hat that are covered by them. You can use as many or as few rubber bands as you like, but keep in mind that the more you use, the more defined your design will be.
Step 3: Mix the Dye
Next, you’ll need to mix the dye according to the package instructions. This will typically involve mixing the powder or liquid dye with water in a plastic container or bucket.
Be sure to wear gloves to protect your hands from the dye. Once the dye is mixed, you can begin to apply it to the hat.
Step 4: Apply the Dye
There are several ways to apply the dye to the hat. One method is to submerge the hat in the dye and let it sit for a certain amount of time, depending on the instructions on the package.
Another method is to use a squeeze bottle or paintbrush to apply the dye directly to the hat. Be sure to saturate the entire hat so that the color is even.
Step 5: Dry and Rinse
Once you’ve applied the dye, it’s important to let the hat dry completely before removing the rubber bands. Once the hat is dry, you can remove the rubber bands and rinse the hat in cold water to remove any excess dye.
Once you’ve rinsed the hat, you can then wash it in warm water with mild detergent and air dry it.
Tie Dye Your Bucket Hat
Tie-dying a bucket hat is a fun and easy way to add some color and personality to your wardrobe. With a few simple materials and a little bit of creativity, you can create a unique and stylish accessory.
Remember to gather all your materials, prepare the hat, mix the dye, apply the dye, and dry and rinse the hat. Now you are all set to go out in style with your new tie-dyed bucket hat. Happy Tie-Dying!